Custom Characters
Contents
- What is Mission Architect?
- Creating Stories in Mission Architect
- Mission Settings
- Mission Text
- Additional Text
- Mission Goals
- Basic Mission Goals
- Advanced Mission Goals
- Playing Stories in Mission Architect
- Rating Stories - The Star System
- Architect Rewards
- Custom Characters
- Custom Enemy Groups
- Architect Entertainment Instructor - Tips & Tricks
- Unlockable Content
- How to Write a Better Story
- Building a Better Enemy
Custom Characters
While Mission Architect has the largest database of heroes and villains in the known dimensions, sometimes it can still not be enough. That's why Architect allows you to create your own characters. You can pick the rank, fighting preference, powers, gender, costume, name and description of your custom character. Custom characters can be used in any of the following ways:
- Story Giver: This is the person who acts as the contact for your story.
- Boss: The major boss you want the players to fight.
- Allies: A hero or villain the players come across on the mission who teams up with them.
- Captive: A helpless citizen the players must free.
- Escort: A person the players must track down and safely lead out off the map.
Custom Characters
You can create a custom character from the My Creations tab in the Mission Browser. Just look for the text that reads My Characters. Select that text then select the button that says Create Character. When you hit this button you'll begin the Character Creation Process.
Rank
All characters in Architect have a Rank. This lets others know how powerful they are.
Character Ranks
- Person: This is the weakest rank possible. The Person rank doesn't even have powers. Because of this you can never have a character ranked Person as a Boss, Escort or Ally. They can only be the Story Giver or a Captive.
- Minion: This is the lowest powered rank in Architect. Minions are a dime a dozen. They're weak, slow and easy to take down.
- Lieutenant: Stronger and faster than a Minion, but no where near as tough as a Boss.
- Boss: Bosses are stronger and better than Minions and Lieutenants. They don't appear as often on a map, but when they do, they're dangerous.
- Elite Boss: More powerful than a simple Boss, Elite Bosses give players pause before they try and take them down. A single player may have difficulty taking one of these down.
- Arch Villain: The meanest of the mean. These characters strike fear in the hearts of whole teams. While they provide the greatest rewards for players who defeat them, they also deal out the most lethal attacks and have the strongest defenses.
Fighting Preference
Once you've selected the rank of you custom character, you can choose their preferred fighting style. You're options are:
- Melee: The character prefers to fight up close and personal.
- Ranged: The character prefers to stay at a distance to attack.
Choosing Powers
We've divided powers up by their associated archetypes. Players who are familiar with our archetype categories will find this method easy to create the characters they want. However, if that's too confusing for you, we've also included an 'All' group.
Difficulty
As an architect, you can decide how difficult you want your custom characters to be. In general, custom characters can easily be more powerful than standard enemies in a mission. Increasing the difficulty of custom characters should only be done if you're intending to make an extremely hard fight for the players.
- Standard: This is the baseline difficulty. It's as close to the normal difficulty as custom characters are going to get.
- Hard: This makes the custom characters much more difficult by giving them access to even more powers than the standard custom characters.
- Extreme: The highest difficulty setting possible. This setting gives the custom character access to every power in the power set. Beware.
Primary Powerset
The first step is to select a Primary Powerset. This is the primary attack powerset your custom character is going to use. Powersets are a group of powers that work well together and have a similar theme. In a mission, your custom character will choose which power from this powerset to attack with, depending on what difficulty you set them at. When you select a powerset, notice the column just to the right. This displays a description of the Powerset as well as the individual powers attached to that set. If you highlight over these individual powers, you'll notice the column just to the right of that will display important information regarding that power. Feel free to explore each of these Powersets until you find one that fits your custom character.
Secondary Powerset
Once you've picked the Primary Powerset, you must not select the Secondary Powerset. This powerset can also be an attack power, but it's recommended that it be something more defensive. However, the choice is yours.
Body Type
Now that your custom character has powers, it's time for you to select a body type (female, male and huge). Experiment with the sliders to get the body type just how you like it. Once you're ready, hit Next to continue.
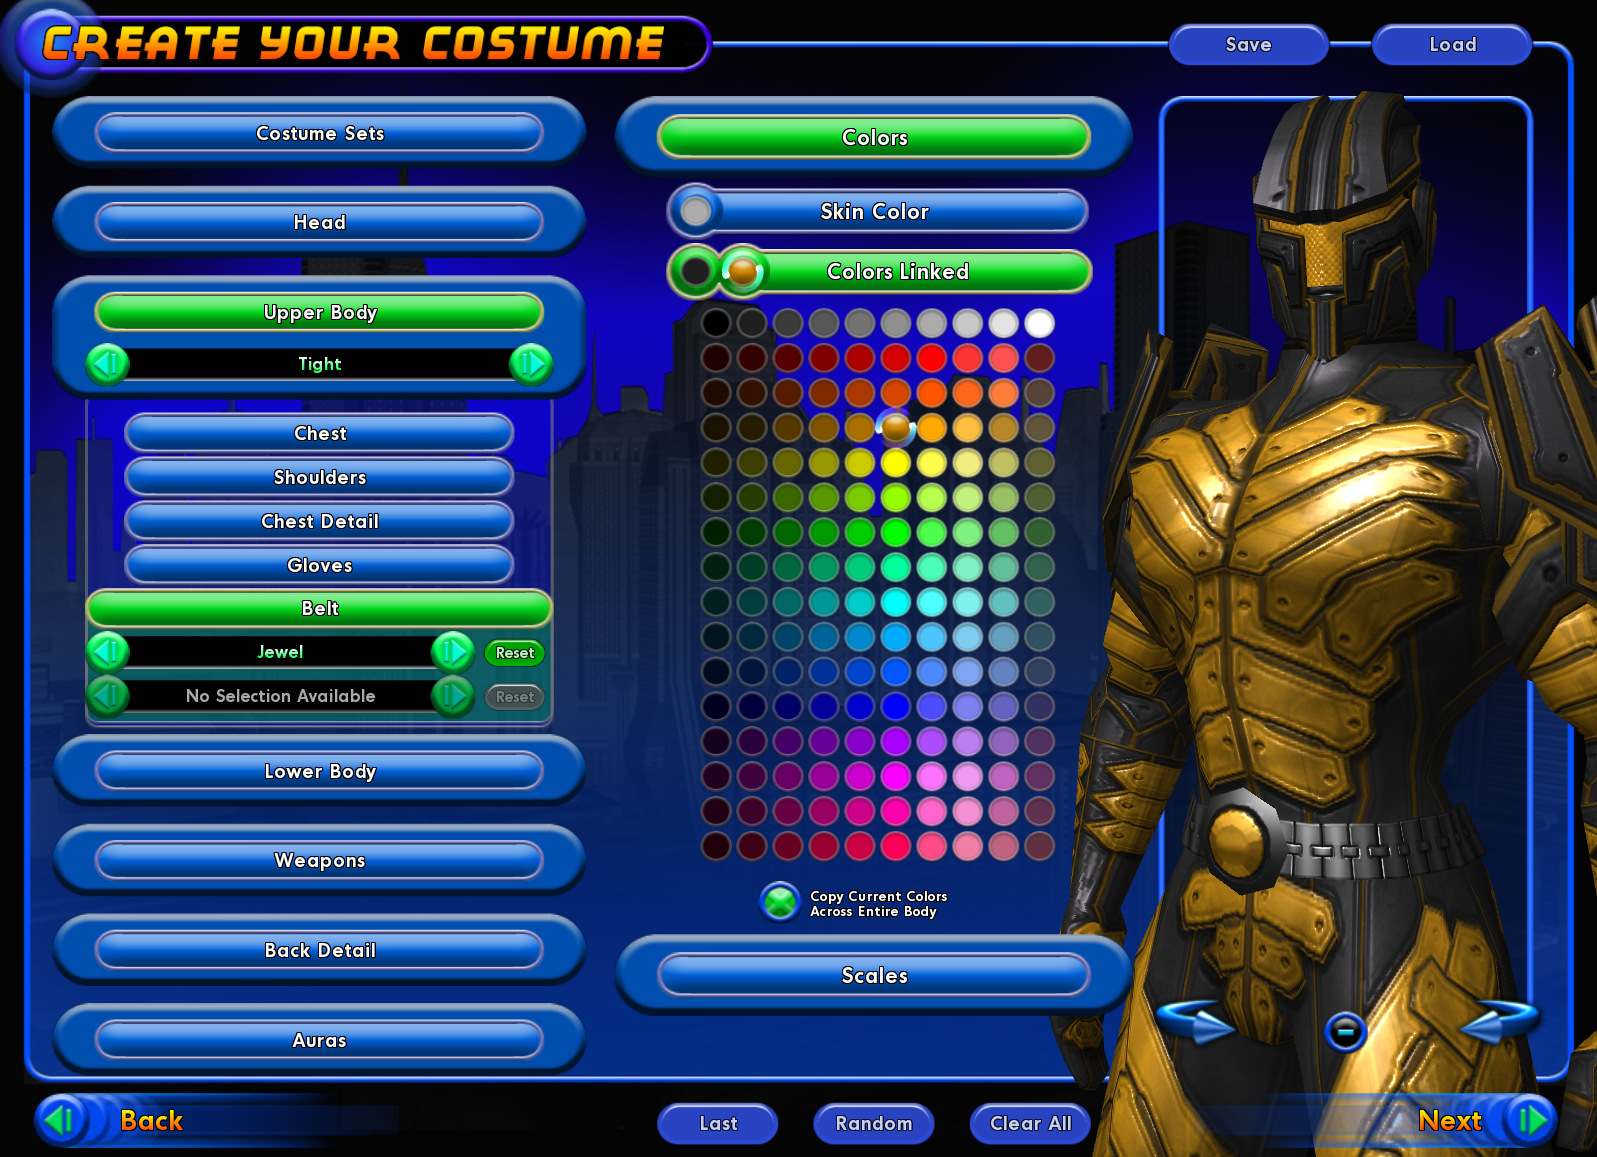
Costume
After body type you get to pick the costume or outfit your custom character is going to wear. Architect has a lot of options to choose from so take your time and get it just right. Note, if you don't get it just right, you can come back at any point and edit the costume.
Registration
Finally, you have to register your custom character with Architect Entertainment. To do this, you'll need to come up with a valid name and description. You'll also need to attach this custom character to an enemy group. If this is your first time creating a custom character, there won't be any enemy groups to choose from. You'll have to come up with a new one. However, when you make your second custom character, you'll notice a drop down list next to the enemy group filed that will allow you to pick from existing custom enemy groups.
