Creating a Villain
Contents
Creating a Villain
Step 1: Select an Archetype
The heart of your alter ego! Archetypes determine the nature of your powers, granting you access to a specific Primary Power Set.

It is also the single most important choice you will make in your character creation.
Each archetype has its own unique powers, abilities, and pros and cons; choose wisely, as this choice is permanent. Power Pools are powers that are accessible at Security Level 6, and ALL archetypes have access to them.
Learn more about the five available Villain Archetypes.
Step 2: Select an Origin
An Origin ultimately determines what types of enhancements your villain has access to.
Origins do not impact your character's power levels or abilities. It just adds a bit of flavor to your character, since it determines what grants him the diabolical powers with which to wreak havoc upon an unsuspecting world.
Science
![]()
The villain received his powers through direct scientific inquiry or was perhaps subjected to a bath in toxic waste, solar radiation, or the sting of a not-quite normal insect. In any event, the villain only needs to know that the wonders of science had some hand in granting him his greater-than-human abilities.
Mutant
![]()
Mutants were born with their powers and manifested them at some point in their early lives; however, some do not show signs of their special abilities until later. For many, the awakening of special powers is what drives them to a life of crime. After all, you are special and must therefore take what you wish from those less worthy.
Magic
![]()
Perhaps you once explored the depths of an ancient pyramid and escaped with a magical ankh that granted you abilities beyond the ken of mortal men. Or maybe you spent much of your time pouring over the arcane scrawling contained in mystical tomes and consequently gained some modicum of control over supernatural forces.
Technology
![]()
Your abilities derive from all the wondrous toys you've cobbled together or "borrowed" from a benefactor. Thanks to these gadgets, you can manage all sorts of illicit activity while thumbing your nose at those less ingenious or less handy with a lock pick.
Natural
![]()
Unlike the other Origins, you do not derive your abilities from any sort of cosmic ray, magical object, or other esoteric means. No, you came by your powers the good old fashioned way: through hard work and determination—hard work and determination that you take out of the hides (and wallets) of others.
Step 3: Select Power Sets and Starting Powers
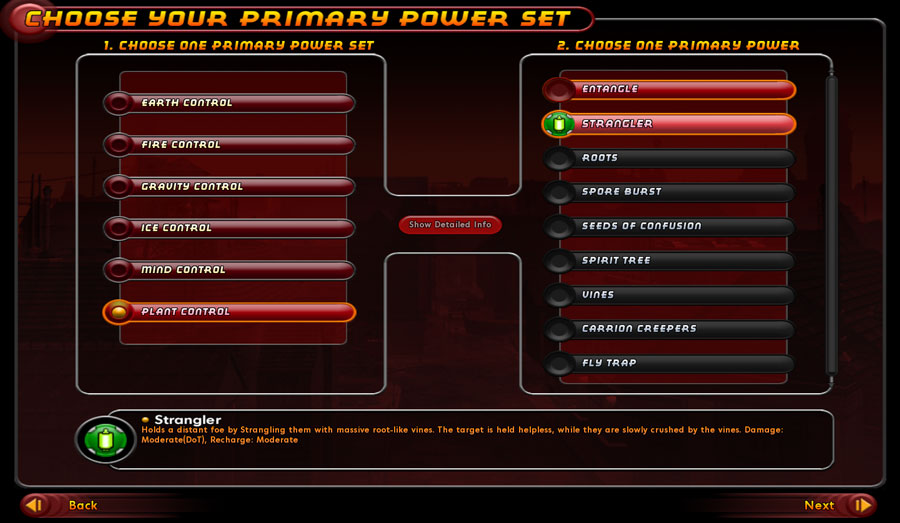
At this point, the real fun starts as you select a Primary Power Set (the number of sets varies according to archetype) and your first power.
After that, you choose a Secondary Power Set and a second power, which complements your first power.
A Power Set is a group of nine related powers. You begin with the powers at the list's top and gain additional powers as you progress through the game. Your level in the game determines which powers you have access to.
Therefore, you won't have access to the more complex ones till much later in your adventures.
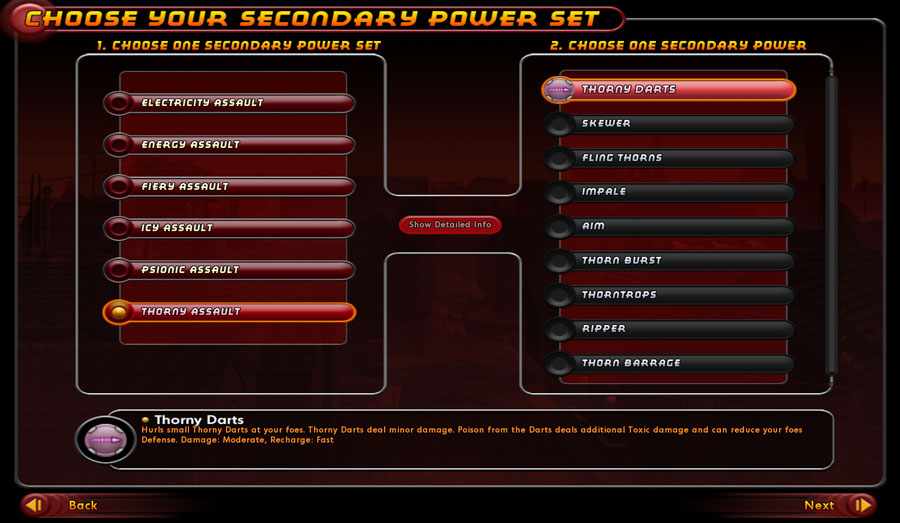
Initially, you get to choose from the top two powers in the primary set and the top power in the secondary set.
The Primary Power Set is the basis for all the powers you wield throughout the course of the game; this is the second most important choice you make when creating an alter ego (you can't access the other Power Sets after you accept one here, so choose wisely).
Important note: The powers you begin with at earlier levels do not become useless as your character grows. In fact, they grow in power with you, and, with the addition of enhancements, they'll be useful throughout the entire crime spree.
Step 4: Select Gender and Build
The next sequence in character creation involves selecting one of three body types: Female, Male, and Huge. These have no bearing on your play style or powers but add another layer of intrigue to your alter ego's personality.
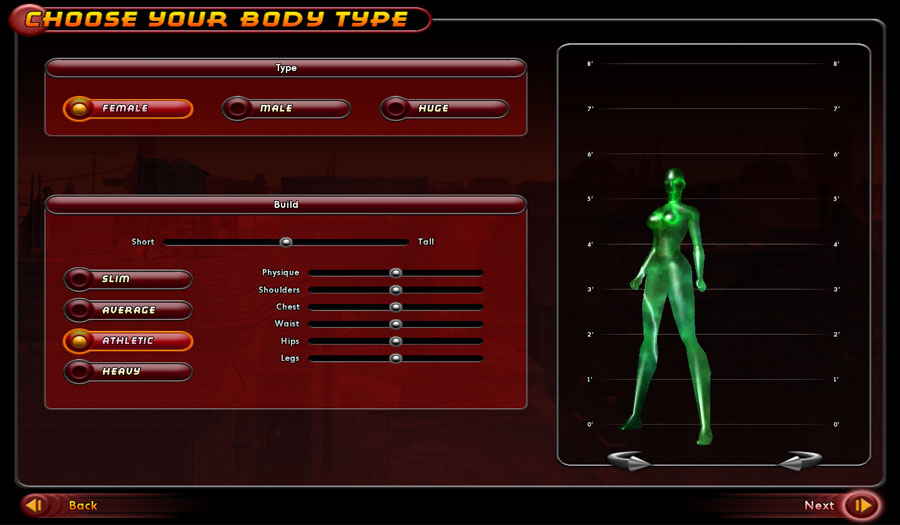
After you choose a body type, use the various Build sliders to adjust your character's level of height and musculature (or lack thereof) via the various body styles: Slim, Average, Athletic, or Heavy. These body styles serve as presets that you can work from.
Again, this has no impact on how your alter ego plays, so go with what looks best to you.
Step 5: Selecting a Costume
To coordinate your costume easily, use the Copy Current Colors button. This makes your entire costume conform to the two colors currently selected. If you want to color each piece of your outfit differently, make sure this option isn't selected.
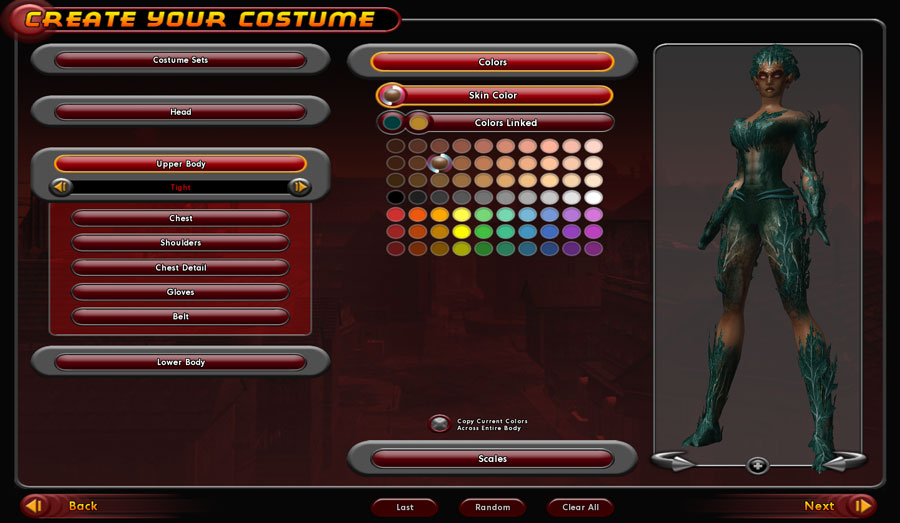
Now just work your way down, styling the head (choose from a wide variety of hairstyles, masks, helmets, glasses, and more), the upper body (torso, gloves, and belt), and the lower body (trunk and boots).
The Costume Design screen allows you to rotate the figure by clicking on the curved arrows; you can also zoom in on your hero's head and torso for a closer look. You can further define the head's shape on this screen.
After selecting a head type, you can use the Shape selector to adjust head's shape.
Fine-tune your chosen shape by selecting the Scales button in the left column. This further defines the features of your character's head. You can modify each component of the head by using the sliders here. The left slider adjusts the component's width, the middle slider adjusts the height, and the right slider adjusts the depth.
You’ll gain all new Costume options in the form of Capes at level 20 and Auras at level 30. To secure these newer accouterments, you’ll need to visit Kalinda, who is your very first contact when arriving on Mercy Island.
Step 6: Choose a Name
This is the final step before you enter the City of Villains. Select a suitable moniker and include any additional details you'd like the world to know about you. You can also enter a unique battle cry for those moments when you're feeling especially villainous.
